Generating a New Connection
The information on this page relates to the new upgraded interface of the IConduct platform. To view information about the Classic version of the user interface, follow this link.
Creating a working connection is a pre-requisite for further data transfer through the IConduct platform. Depending on the settings, the user-defined connection can serve as a data source and a data target used for the import and export actions.
To Create a New Connection:
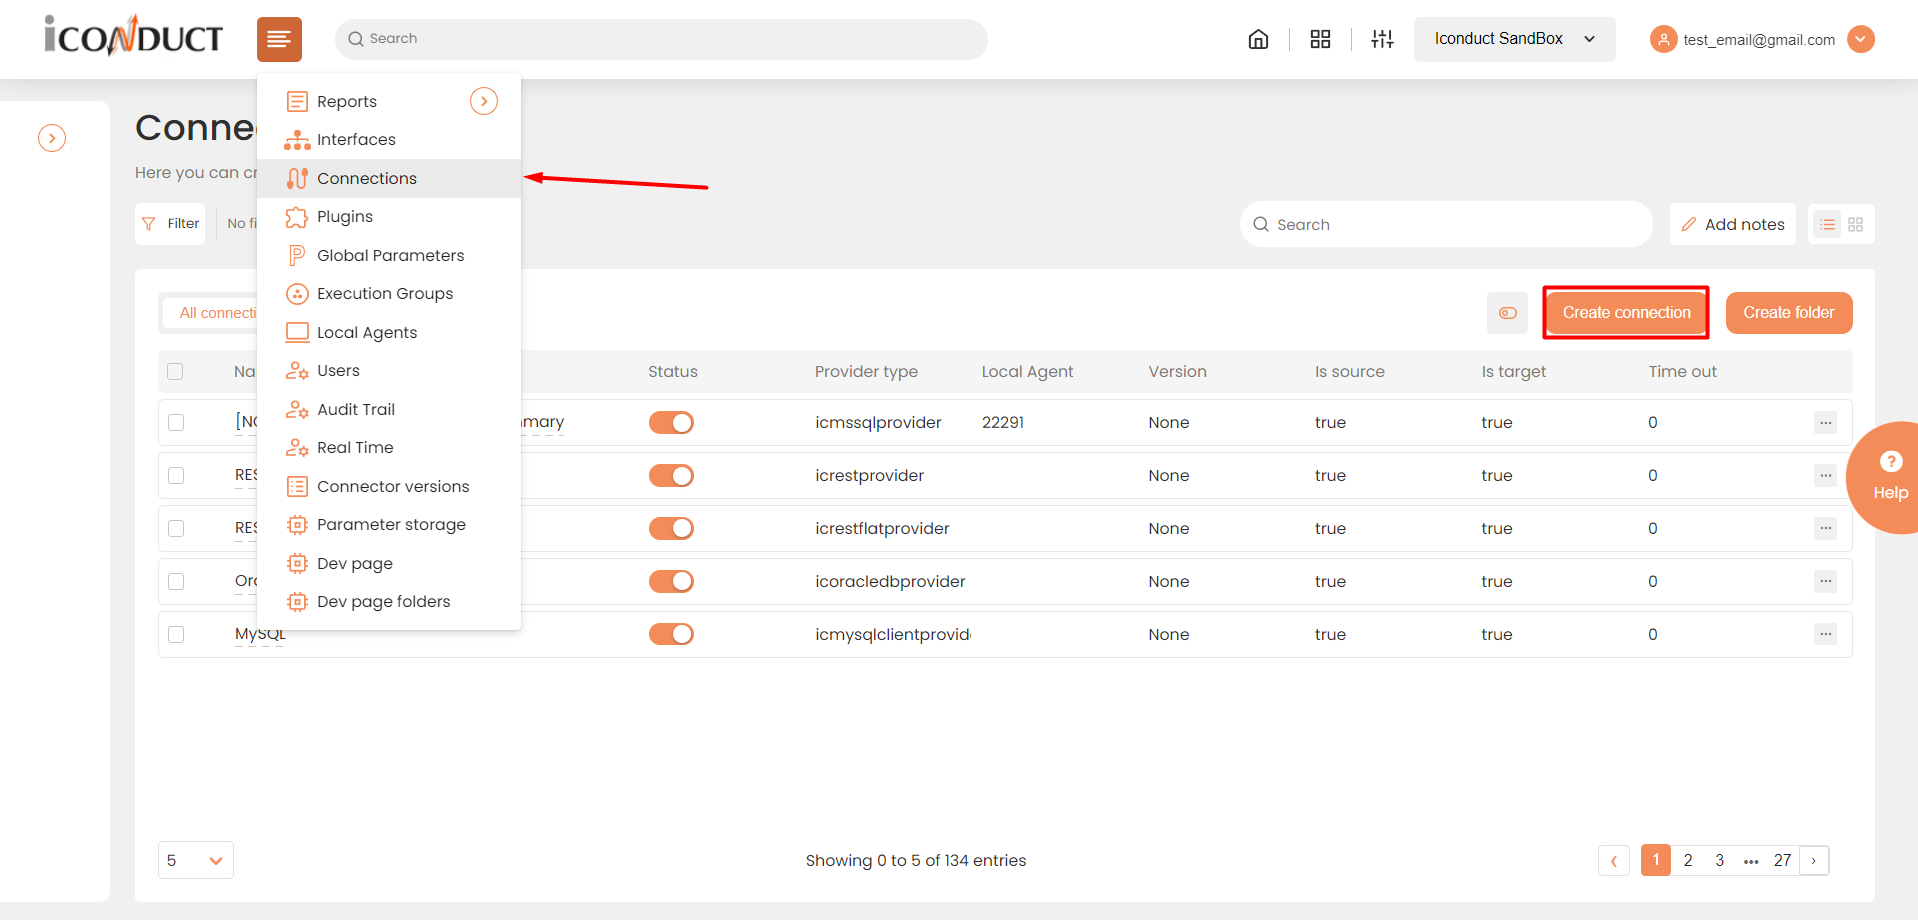
- Select Connections in the Main Menu and hit Create connection in the Toolbar.

Accessing connections
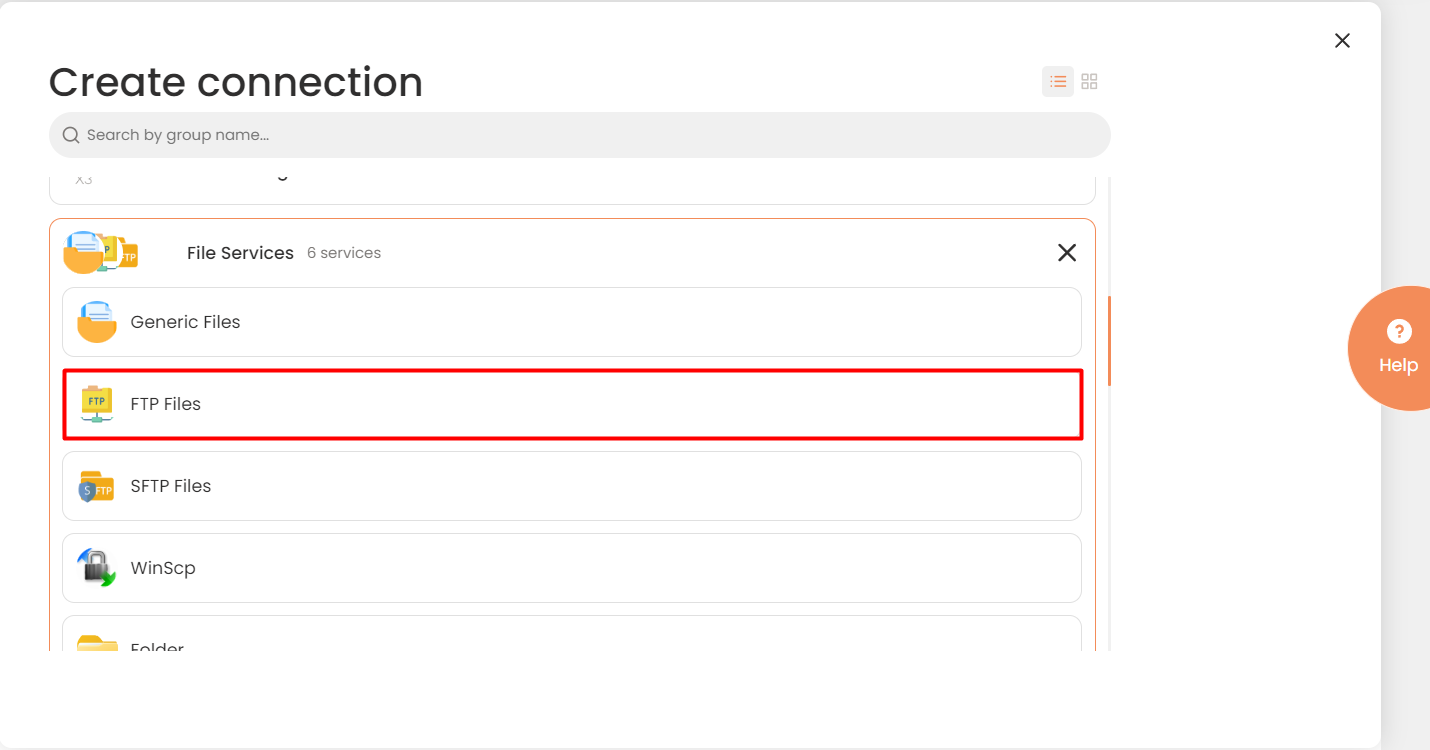
- The Connector Selection Page appears. Select the {Specific Connection} item from the {Specific} section.

Connector Selection Page (Example)
- In the {Specific Connection} work area, fill in the fields and click Save.
Each Connection has its particular set of fields. Refer to the specific connection description for more precise information.
|
Field |
Description |
|---|---|
|
Name |
The new connection name. Enter a connection alias here. |
|
Is Active |
Toggles connector’s activity at interface execution. Enable the checkbox to activate the connection for execution. |
|
Is Source |
This connection entity is available as a data source for Import (writing to Schema). Enable the checkbox to ensure data import. |
|
Is Target |
This connection entity is available as a data target that receives data from schema to current data container. Enable the checkbox to ensure data export. |
|
Agent |
The LAN you are working with. Select "IConduct" for cloud systems and your corporate agent for internal systems. |
| Folder | A folder, into which the connection will be saved upon creation. |
|
Date/Time Format |
Allows defining the date and time formats appropriate for the connection. For detailed date and time formatting operations please refer to https://msdn.microsoft.com/enus/library/8kb3ddd4(v=vs.110).aspx |
|
Timeout |
The length of time (in milliseconds) the IConduct platform waits for a response from the connection provider before returning a timeout error. Set the time value to stop the system from connection attempts. |
|
Implementation Type |
Defines the connection implementation type. Select from the drop-down list: Default. IConduct scheduler works on the cloud agent set in the Cloud Agent field. Java. IConduct scheduler works by sending requests to a Java agent. |
|
Version |
Select a version of the connection you need to use in the interface. In some cases, only the latest connection versions might be applicable, while in others, older versions will be more suitable due to the compatibility. |
- Optionally, you can test the connection efficacy and make sure that the data is returned correctly. Once the connection is saved, click Test Connection in the toolbar.

Testing connection
If the created connection works, the system returns a success message. Then,you can test an SQL query with SQL box if you have a query you would like to run.
- The new connection appears in the Connections section. Once you have created a new connection, you can edit its properties, enable/disable it and use it as part of an interface.
- In the Connection box, type in a relevant name for the new connection.
- Click Is Active, to enable this option (optional).
- Select a Cloud Agent from the list of available cloud agents.
- Click Is Source to enable this option (optional).
- Click Is Target to enable this option (optional).
- Continue this procedure according to the instructions in the relevant section of the user guide (depending on the connection type).
- Press Create to save the connection.
You can now test the new connection(s) to make sure they are active and working correctly, by clicking the red button.
